PLANNING/RESEARCH:
The two most important aspects of this first stage were the internet in general and the website 'Blogger'. Firstly, the internet allowed us to conduct research on the thriller genre by looking at these types of films and the various subgenres that go with it to inspire and so shape our own ideas. Our approach was to use the internet to discover films that would motivate us, to see what kind of audiences enjoy what and to then find specific examples to interpret. Therefore, through search engines like 'Google', we used: film review websites such as 'Rotten Tomatoes' for insights on popularity and audience attendance, 'IMDb' to get synopses for films which would give us an idea about what makes a good thriller film. We investigated 'YouTube' to find film clips that would illustrate what the typical codes and conventions that directors utilise and that we could also integrate.
From websites like these we were able to see what kind of thriller films audiences enjoyed watching and consequently guiding our thoughts as to what direction our film should take to make the best possible opening sequence we could film.
By using this website we were able to research films with concise plots that would allow us to take in various ideas for codes and conventions of the thriller genre that we wanted to cover in our own opening sequence. The search engine was very user-friendly in that if we found a film that showcased our plans, then 'IMDb' would suggest other similar films and this helped the research process go a lot faster.
Through 'YouTube', we were able to look up specific examples of films or other relevant material regarding our research. This allowed our research to go into more depth by utilising multimedia rather than just text to present our findings. As well as this, 'YouTube' was also one of our main ways to distribute our film to audiences.
Pros:
- 'YouTube' as a means of viewing is very good because it is a mainstream form of distribution with features such as the share button which links to new media websites such as 'Facebook' and 'Twitter' where more people can see it because it is on more platforms.
- The website also has a statistics button which displays how many people have seen it and how effectively it has been distributed through numerical figures.
- Videos are recommended based on browsing history which benefited the research process by making it easier to discover related video content on thrillers.
Examples taken from different videos on 'YouTube'
Cons:
- The feedback in response to the video is varied and dependent on the individual. Often people give one line reviews with little explanation or 'constructive' criticism to help evaluate our film.
- Once it has reached other video sharing websites it is hard to review and evaluate in the same way as 'YouTube' offers.
- Some recommended videos were off-topic or brief which led to wasted research time and possibly could have altered our film to be something different from what was meant to be achieved. For example, after watching an opening sequence to a horror film with thriller elements, our sequence may have been more horror-like which is incorrect because the genres are different.
To demonstrate all we had gathered thus far, we used 'Blogger' as a media tool to organise and present our findings and everything else in an efficient way. It allowed us to present this as a multimedia blog post which meant that: we could modify the layout and design e.g. change the typography, include pictures and even videos by incorporating new media such as linking these videos from the aforementioned 'YouTube'. As well as this, to make it easier to collaborate our ideas better, we were able to publish our blogs in a certain order so that we were able to find and read the posts in a simpler way rather than searching through piles of our collaborated collection of information. It was all a learning process and after multiple uses of the website, we became familiar and acquainted with this technology as it proved a useful tool as the video below demonstrates.
Video showing the features of Blogger's posting system that we made use of
PRODUCTION:
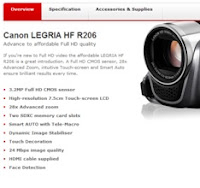
During the actual filming, we were given just a camera and a tripod to work with and made the best out of the features they had to offer. The DV (Digital Video) camera that we used was a Canon LEGRIA HF R26 which was miniaturised and therefore portable, and more importantly user-friendly, and as a result benefitted the production process of our film.


Video detailing the main features of the camera which are useful for film-making

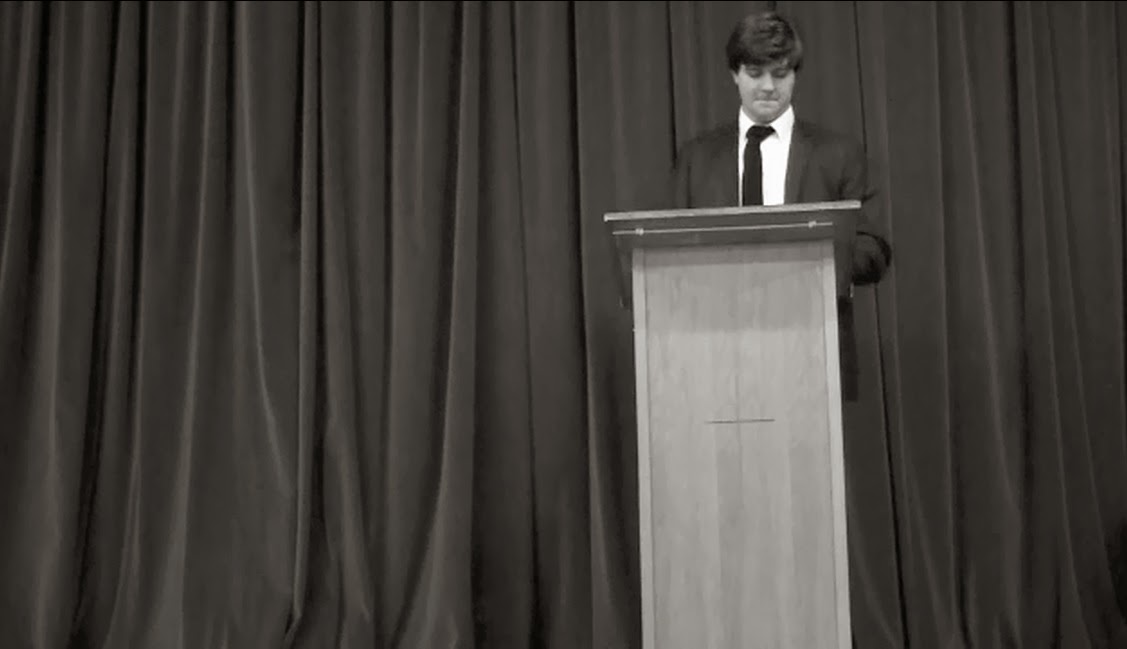
As an example of how technology shaped our film, here is a shot of our actor playing a politician about to give a speech. From the preliminary task we had learned that the camera would allow us to zoom out all the way to portray a wide angled long shot which allows the audience to see the features such as his suit, the podium and the curtain in the background. We capitalised on these features so that the framing captured the connotations of the character's role precisely. It was easy to accomplish this because the camera had the ability to play back footage so that we could review it whilst on location to get our desired shot instead of finding out too late at post-production.
With this shot, the audience sees, the detective for the first time with the camera aiding his first impression. The camera is able to auto-focus on the most important part of the mid shot, which is the actor's face, and the seriousness connoted because of it. It also automatically adjusted the lighting so that the shot was not too bright but still allowed it to be flexible with the addition of a black and white visual filter. The precision and clarity of the technology of the camera is even visible with the picture and text of the book in his hands. This meant that our audience will know that the book is an inter-textual reference to the world's greatest fictional detective, Sherlock Holmes.
During this scene, dialogue was exchanged between two actors, therefore demonstrating that we made use of the built-in microphone. This was useful as it recorded the audio together with the video rather than us having to hold a microphone over the actors out of frame and sync the audio later as in some productions. However, we learnt beforehand in the preliminary task that the camera's ability to pick up sound quality was not great which is why we based the opening sequence entirely around indoor locations to get the best quality.
POST-PRODUCTION:
For this phase we used hardware which was the 'MacBook Pro' and the software that was included as a consumer audience product known as 'iMovie'.

The MacBook has clear audio speakers to listen to our opening sequence, and with good quality and a long lasting battery which allowed our group to work on the project for as long as we needed to.
One aspect of the software iMovie was that it contained different preloaded elements in the program which meant that we could create an authentic opening sequence to a film by adding in atmospheric scores, genuine titles and captivating effects. Though, the problem with all these aspects being preloaded is the fact that as these are the only choices offered, it makes things limited. Therefore, we had to get around this problem by looking up tutorials such as the one below and source titles and scores from other sites on the internet such as Freeplay Music and Stock Footage for Free.
iMovie allowed us to work in a non-linear editing style unlike traditional linear filming. This meant that we were able to film different scenes in no particular order on suitable dates for us because editing now is as simple as dragging and dropping footage from these sessions into the correct order. It took a while to get used to but once we did, it helped out massively with post-production. For example, the two shots above are an illustration of cross cutting which shows that these two characters are narratively related to each other. Both of the shots were filmed on different days in different locations and thanks to non-linear editing, all our compiled footage could be rearranged to suit our narrative plot.
With this post-production software we could also use effective transitions to sew together our film rather than simply cutting shots together. The first shot demonstrates a fade to white which we made use of to connote that the therapy patient is having a flashback of prior events.The second shot is a more complex morphing transition where the shot of this character turns into the shot of a victim. This is to support the radio voiceover about the two deaths, and the significance of this transition is to show that it is purely intended for the audience to witness, much like how a non-diegetic score works.


No comments:
Post a Comment